

Aperture is one of the components of the Exposure Triangle (the other two being shutter speed and ISO which I’ve also discussed.) Now only does the aperture control how bright a photo is (the exposure) but it also controls how blurry (or not) the background of the photos is. In this post, Aperture Explained | Getting a Blurry Background, I am going to give you the basics of aperture and explain how to get a blurry background without editing. Click here to get my FREE aperture cheat sheet (this is taken out of the Master Manual Mode handbook that has been used by MANY students to achieve manual mode success!)

Full disclosure: learning to use a camera isn’t hard. Teaching it is hard. I’ve taught countless students to use a camera in full manual mode. However, it takes hours. Which we don’t have here but I do offer in Mom Photography School. Click here to read more about MPS.
Exposure
Just like all the elements of the Exposure Triangle, the aperture all affects how bright or dark the photos are. This actually makes perfect sense when you look at the graph above-
the bigger the hole, the more light will come into the camera- the brighter the image will be.
the smaller the hole, the less light will come into the camera- the darker the image will be.
Image too dark? Open the aperture. Image too bright? Close the aperture.
Adjusting the aperture not only changes the brightness of the photo, but it also changes the depth-of-field (aka: blurry background.)
Depth of Field
Depth-of-field is what gives the image a blurry background. Before we dive into depth-of-field, it’s important to understand that the aperture has nothing at all to do with your camera body. It is all about the camera lens. Different lenses have different aperture ranges. Ok, now that we know the aperture is located in the lens, let look at this pretty graphic of aperture.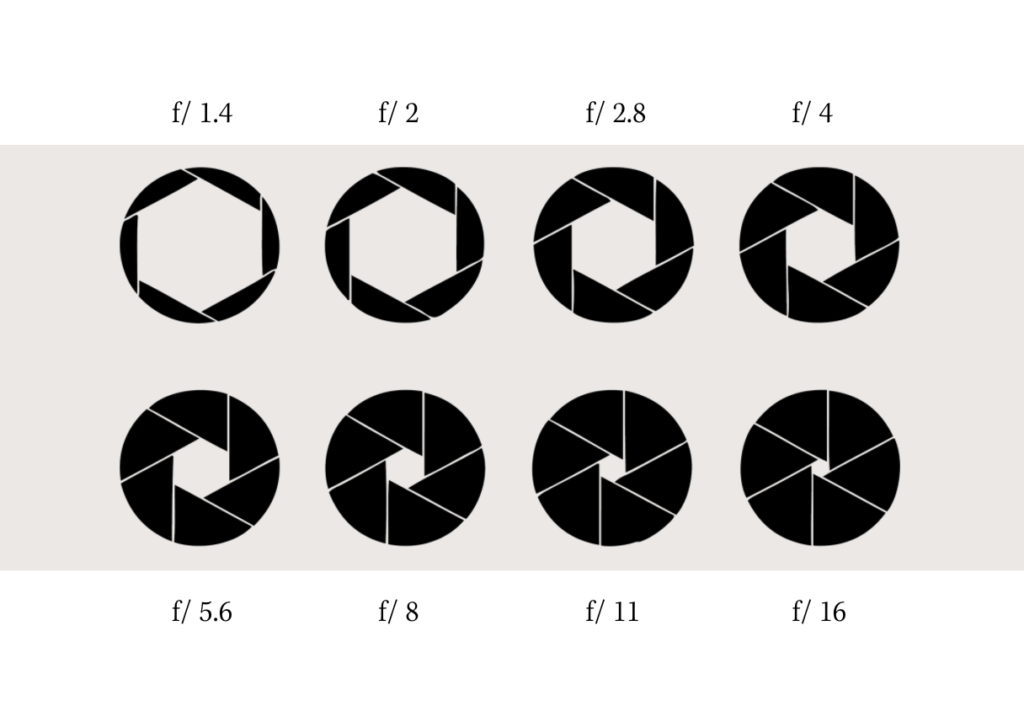
The smaller the number, the wider the aperture (bigger hole,) and the blurrier the background.
The bigger the number, the smaller the aperture (smaller hole,) the less burry the image will be.
Reread that again and look at the chart above.
Want a blurry background? Put your aperture on a smaller number (open it up wide.)
Don’t want any blur? Close your aperture by setting it to a large number.
More of a visual learner? Hop on over to my YouTube video all about aperture.
So there you have it! Aperture Explained | Getting a Blurry Background. Granted, there is much more to aperture than getting a blurry background. To fully understand aperture (and get a good image), you need to understand shutter speed and ISO as well. Interested in FINALLY learning to use your camera? Come joining me in Mom Photography School for only $35! Click here to read all about how much moms all over the country have gotten amazing results with MPS.


")


VIEW THE COMMENTS
add a comment